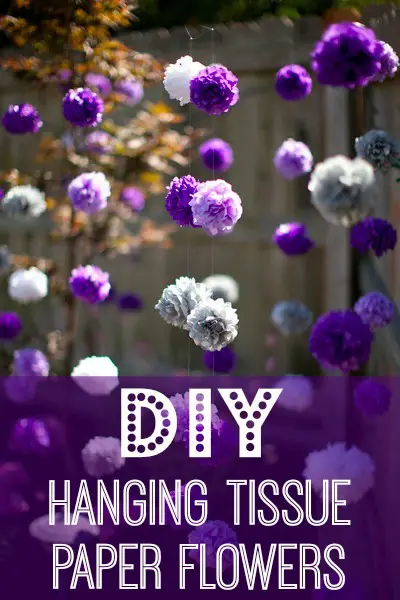
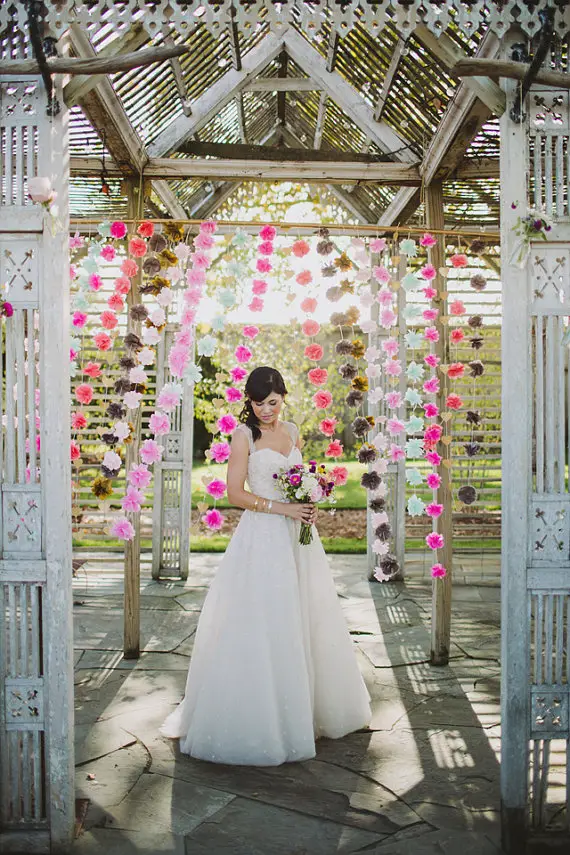
Tissue paper flowers are very easy and cheap to make but they create a wonderful visual impact at weddings. This tissue paper flower backdrop video tutorial post shows how to create cheap yet visually stunning decor.
If you are looking for an inexpensive, easy DIY for your wedding then you should definitely try these tissue paper flowers!
Tissue paper flowers are not only affordable and pretty but also very versatile.
You can make them smaller or larger depending on your desired look and the space you have to decorate. They can also be customized to match your wedding colors. Using tissue paper flowers is a great way to decorate a reception area cheaply but beautifully.
There are many ways to utilize tissue paper flowers:
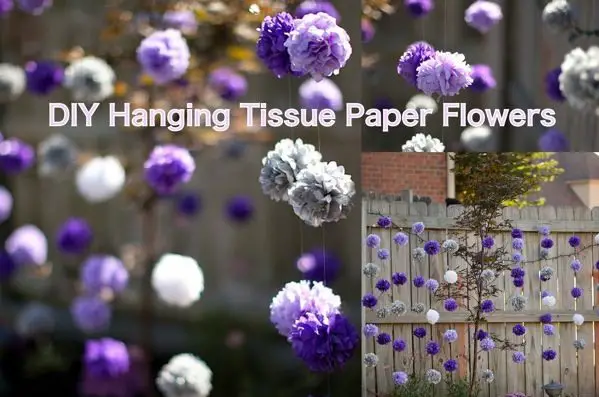
Tissue Paper Flower Backdrop Tutorial
Today we’re sharing a DIY hanging tissue paper flower tutorial.
These tissue paper flowers were inspired by our other Tissue Paper Flower posts.
We’ve include everything from how to make these tissue paper flowers to how to make them appear hanging from space. We’ve also included where to buy needed supplies with affiliate links to websites we trust.
DIY Tissue Paper Flowers Tutorial
The videos below shows all the steps to make tissue paper flowers.
How To Make Tissue Paper Flowers
Making tissue paper flowers is rather simple. In this video tutorial you can see all the steps:
https://www.youtube.com/watch?v=jayfHpmlSD
The first video shows you how to make tissue paper flowers and the second video shows you how to put it all together for the hanging effect!
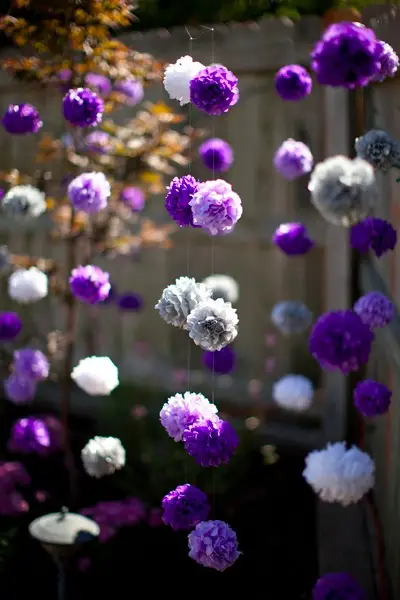
Tissue Paper Flower Backdrop Tutorial
Once you’ve made the tissue paper flower, you can then use those for larger scale decor.
This video tutorial shows how to make hanging tissue paper flowers:
This video shows how to pull together all the supplies and actually create the backdrop with hanging tissue paper flowers.
Supplies needed:
DIY Hanging Tissue Paper Flowers Step By Step
Below are the step by step instructions for creating this fun paper flower poms!
It’s a really fun project for a wedding or any event where you need to decorate.
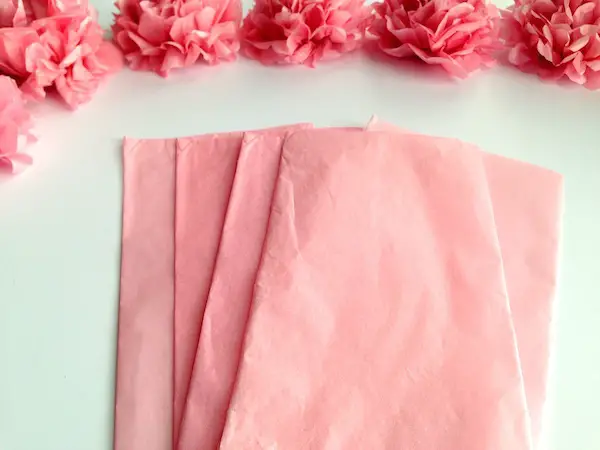
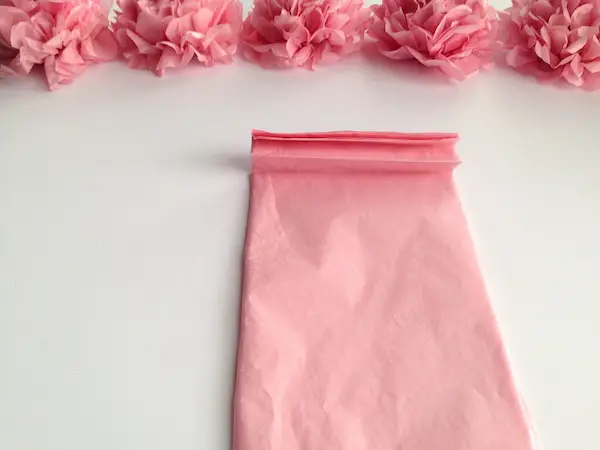
Step 1: Cut rectangular pieces of tissue paper and stack 5 together.
The tissue paper can be as big or as little as you want your flowers to be. I use smaller flowers so my rectangular paper pieces are 8 in by 4 in. For a bigger impact and less work, just make the rectangle pieces bigger for bigger flowers. You can stack more pieces together but I found 5 to be the sweet spot. No matter what size of tissue paper you buy you can always adjust by cutting.
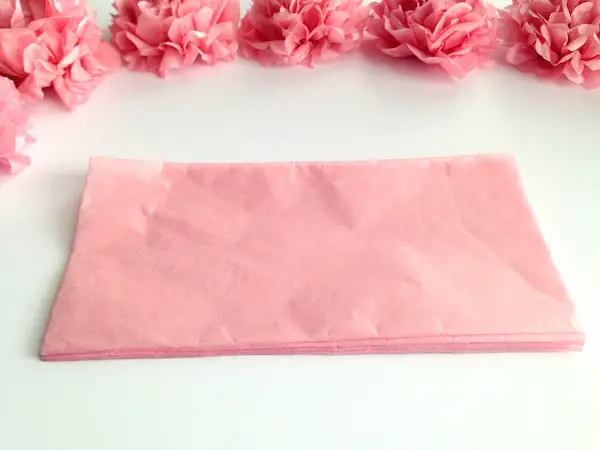
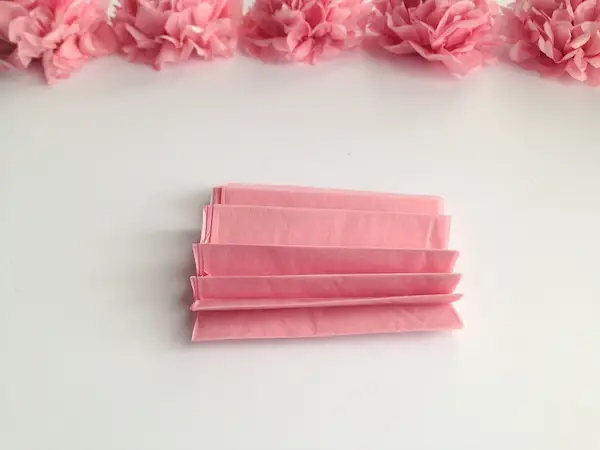
Step 2: Fold stack of tissue paper into an accordian fold.
Stack the papers together and start from the bottom folding back and forth. You don’t have to be perfect here, especially on the edges since you will cut them off!
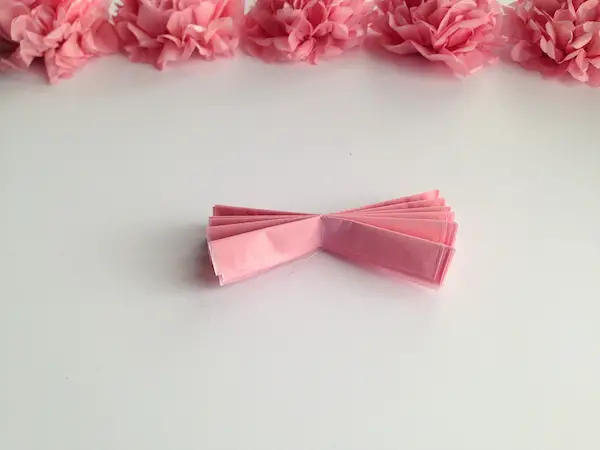
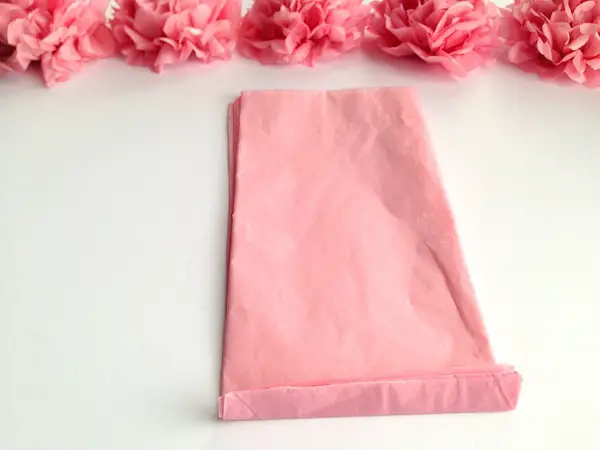
Step 3: Tie folded tissue paper in middle with string, rope, or wire.
You can use almost any type of string to tie your paper together. I’ve used ribbon in this example but mostly use fishing line. Make sure the knot is secure
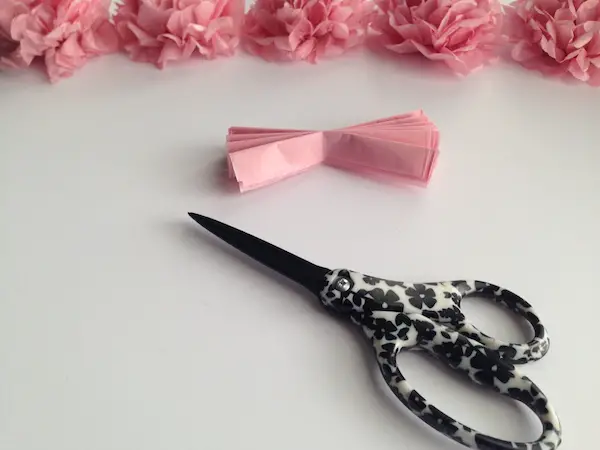
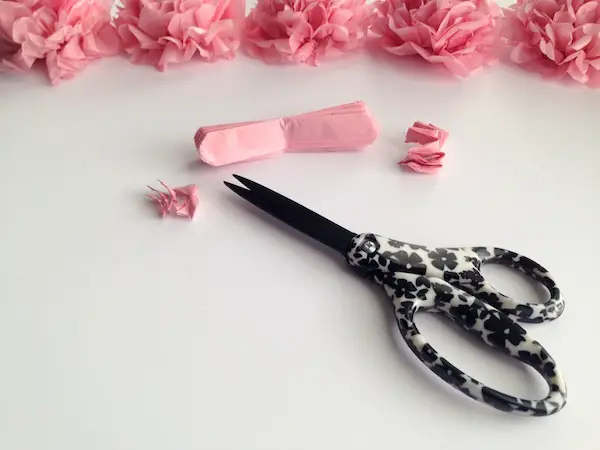
Step 4: Cut edges into more petal like rounded edges.
Use basic craft scissors to cut the edges off of your folded paper on both sides.
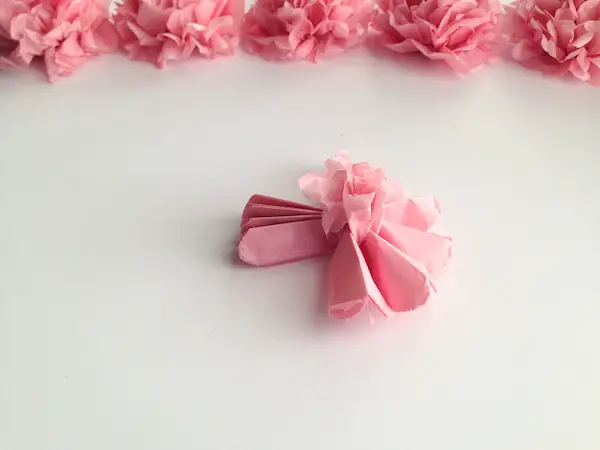
Step 5: Fan out tissue paper and fluff first layer up on both sides of the center.
Fan out one side of the layers and fluff up the first layer of tissue paper. Fan out the other side and fluff up the first tissue paper layer wrapping it around the first and squeezing them together.
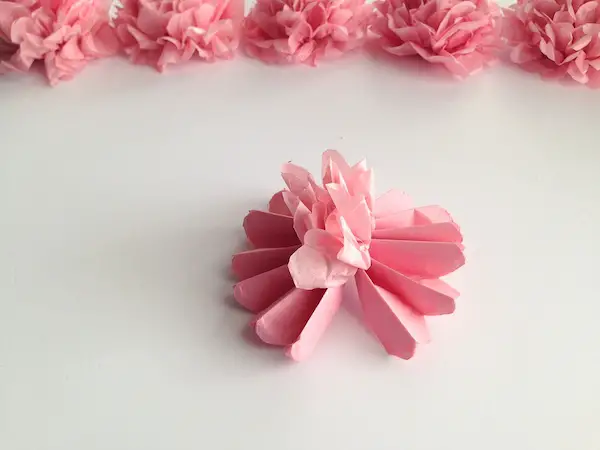

Step 6: Fluff tissue paper inwards one layer at a time on both sides wrapping around the center.
Going back and forth between the sides fluff up the layers and wrap them around the previous layer. Don’t worry too much if you tear a layer or the edges don’t match up perfectly on the sides. It still ends up looking good!
Step 7: Measure & cut out fishing line for space where you will hang the flowers & decide on the distance between flowers to hang on the fishing line.
Before start hanging the flowers measure the space where they are going to be hanging. This might seem obvious but it’s very important. You’ll need to measure out the lines of fishing line and cut them before you start applying the flowers. Once you have all your lines cut this will also help you decide on the distance between flowers.
Step 8: Place a line of white craft glue on the back of a flower and place the fishing line through the glue.
Surprisingly the best glue I found for this process was basic white glue. The first step in applying the flowers is to apply a thin straight line of glue down the back of one of your completed flower halves. Then based on your measurements for the fishing line, find the right spot and slide the flower under the fishing line. Adjust the line so it goes through the glue.
Step 9: On the other flower, place glue around the outside edges.
On the other flower half apply glue around the edges and in the middle. Apply enough glue to make sure the tissue paper will stick but don’t overdo it.
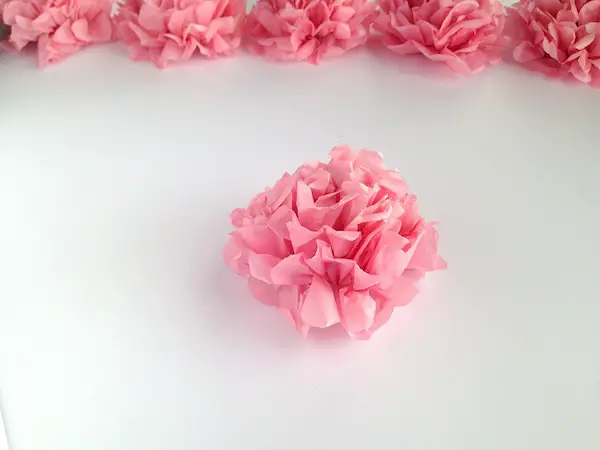
Step 10: Put flower halves together & press edges together with glue to hold.
Place the two flower halves together and press them together. Press all the outside edges together to make sure it looks like one round pom instead of two halves. Fluff the nearby layers toward the center to give it a more round appearance.
Step 11: Let the glued paper flowers sit to dry.
This is important since the white glue isn’t the fastest drying glue. If you use something else it might cut drying time but I like to leave my flowers for a couple hours if not overnight to make sure everything has dried and the flowers will stay on the line.
Step 12: Hang lines of fishing line
To actually create the tissue paper flower backdrop you’ll need to hang the flowers up.
After the paper flowers have dried all you have to do is hang the fishing line! You can tie the strings of hanging flowers from anything really. To hang the flowers from “nowhere” run an extra fishing line across a space horizontally and hang the lines from that.
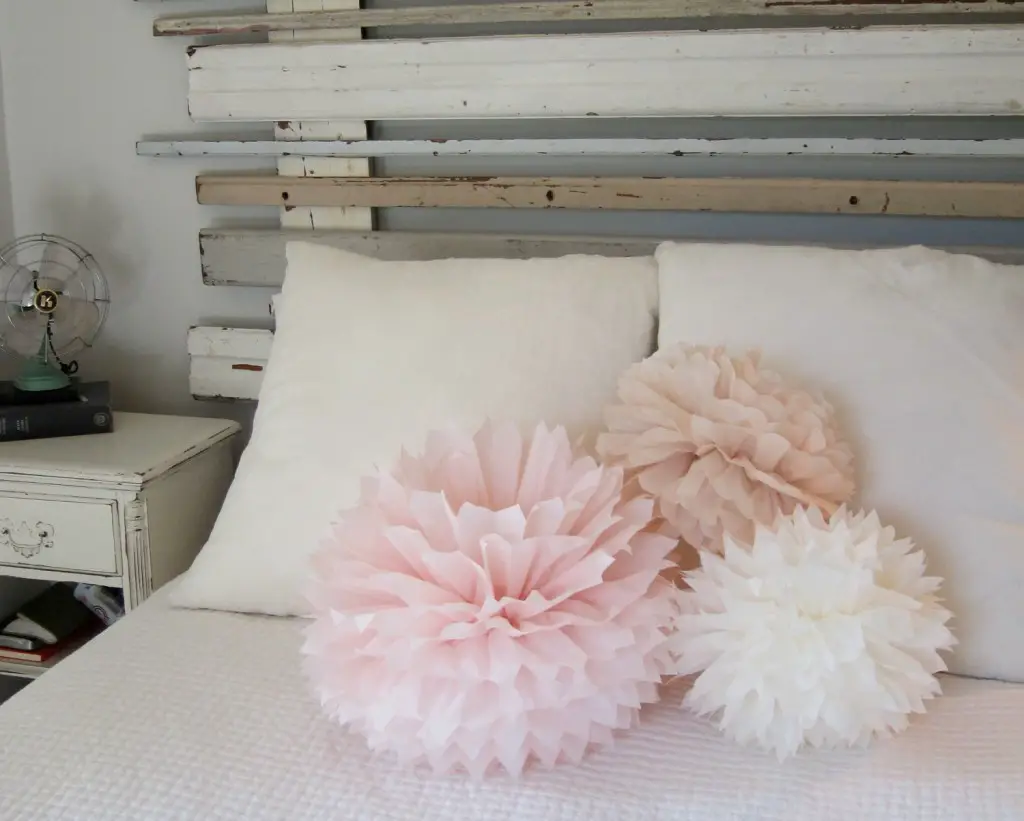
Step 13: Enjoy your hanging tissue paper flowers!
Alternative: DIY Tissue Paper Flower Kit
If you love the look of these hanging tissue paper flowers but don’t feel like going through all the steps listed above (or you aren’t very crafty), you can purchase a DIY kit of pre-cut flowers from Martha Stewart.

Martha Stewart Crafts Pom Poms – This kit has easy to assemble pom pom tissue paper flowers you can make from pre-cut pieces. It saves you a lot of steps in the process that are more time consuming. You won’t have to measure and cut, you can just fluff and hang! It’s an easier way to accomplish the same type of look in case you are short on time. Each kit from Martha Stewart makes 5 pom poms and can coordinate color wise with your wedding or party colors.
You can also find a lot of great tissue paper poms available from sellers on Etsy. These tissue paper flowers and tissue paper poms will save you a ton of time since they are already premade. Here are a few that we love:
Neutral tissue paper poms by Paperwhite Design
Tissue paper hanging garland by lovelou Collective.This sweet hanging garland is an example of tissue paper flowers pre-made on Etsy for wedding purposes.
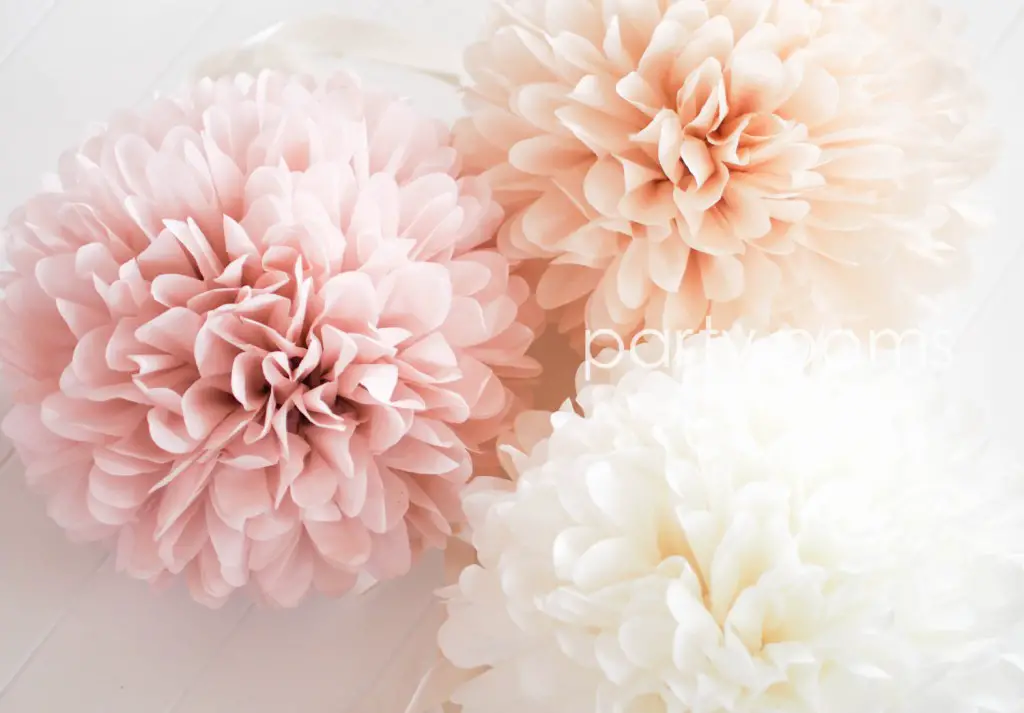
Tissue paper poms by Party Poms – They have a ton of tissue paper pom and flower options in their shop.
Enjoy!
Want more paper flower ideas?
Check out these related inspiration and tutorials: