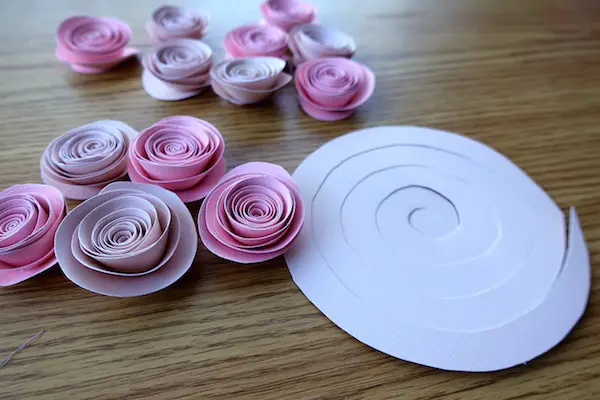
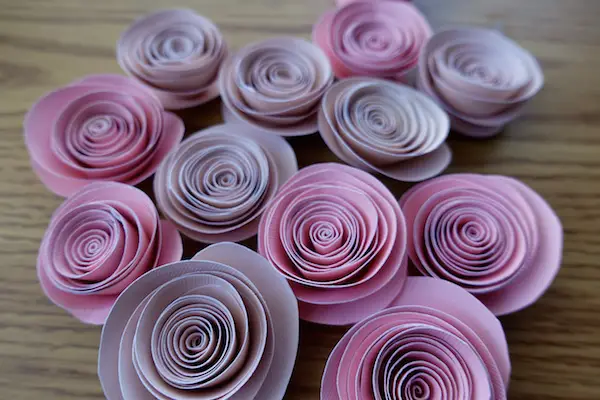
You know we’re big fans of paper flowers and have shared various tutorials in the past. We’ve had a few requests on how to make a rolled paper rose which this tutorial delivers!
Today we’re sharing a quick and easy paper flower tutorial.
DIY Rolled Paper Rose Tutorial
Rolled Paper Roses Supplies
(affiliate links):
- Colored Paper
- Scissors
- Hot glue gun and glue sticks
- Circle/lid to trace
- Pencil or pen

Rolled Paper Roses Instructions
The video above shows you how to make these rolled paper roses in an easy step by step fashion.
- First, trace a circle onto your colored paper.
- Cut out the circle.
- Cut a spiral shape into the circle.
- Starting on the outside, roll the edge of the spiral inward.
- Roll the spiral until you reach the end.
- Let the rolled paper unspiral a bit until you get your desired shape.
- Secure the bottom with hot glue.
- Make many, many more so you can have a bunch! These look best in groupings of multiple.
The instructions are more clear while watching the video so make sure you check that out. These really are very simple to make once you get started. It’s a great project to have kids help with or to do while watching something fun on Netflix.

Now you know how to make a rolled paper rose!
Ways To Use Rolled Paper Roses
These rolled paper roses can be used for bridal events, wedding bouquets, or even upcoming Valentine’s day decor.
There are a ton of different ways you could use use these adorable little paper flowers once you’ve made them.
- To make a bouquet full of rolled paper roses.
- Mixed in with other paper flowers for a mixed bouquet.
- Scattered around tables for decor and color.
- Attached to presents as a little something extra instead of a bow.
- As decor in your home for extra color and texture.
Those are just a few ways to get you started but of course there are no limits once you get creative.
If you loved this paper flower tutorial, check out our other paper flower tutorial posts: