Today’s DIY project is a simple one that can add a bit of variety to your rustic wedding table or be given as a keepsake. Wood slice coasters can be used for a variety of decorations at a rustic or country style wedding.
If you have the tools and can get your hands on a fallen tree, then these decorations can also be a very budget friendly DIY project. You’ll only have to purchase items to decorate and seal the coasters!
Wood Coasters Supplies:
- wood to be sliced (or precut wood slices)
- miter saw
- paint
- sharpie or paint pen
- wood sealant spray (options: Fast-Drying Polyurethane Aerosol, Clear Acrylic Coating Aerosol Spray)
Wood Coasters Supplies:
Find your wood.
For the purpose of this DIY we used a tree cut down from a neighbor’s yard. Trees are always being trimmed so keep an eye out or contact a company that cuts down trees – you’ll get the main supplies for free! You can also scavenge your neighborhood for fallen trees to recycle. Look for pine or oak as they are easy to work with for this DIY.
Finding the thickness you are looking for will be the first step in the project. If you want to make coasters for your wedding guests, you will need a thinner part of the tree. If you want to make larger wood discs for centerpieces, you will want to find a larger part of the trunk of the tree.
If you don’t want to find and cut wood, you can also buy precut wood slices.
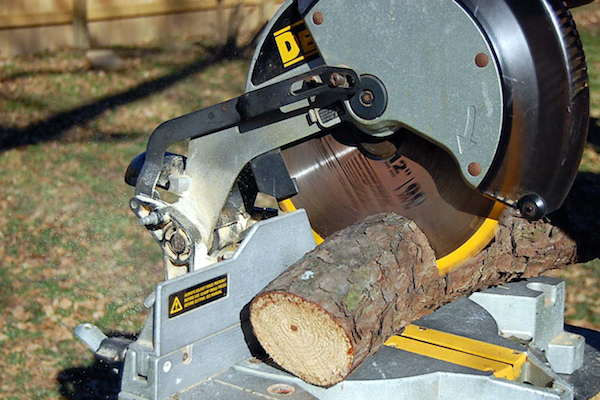
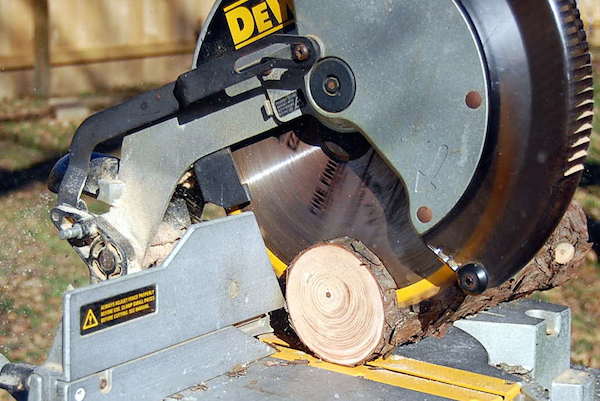
Cut the wood.
Use your chosen saw to slice the wood into discs.
For a more rustic feel you can cut the wood slices at different levels of thickness. Leave the bark on the wood slices where possible as it gives it a great rustic feeling.
Dry and sand your wood.
Lay out your wood slices to dry. It’s best to let them dry for at least a few days or even a week. Make sure you don’t lay them on top of each other during drying or they will stay damp and start to mold.
For sanding your DIY wood slices you can use an electric sander or air tool sander or sand them by hand. Most slices probably won’t need a lot of sanding if they were cut well. Go over the edges and some rough spots to get a flat surface that is uniform. This will also get rid of any mold that may have accumulated during the drying session.
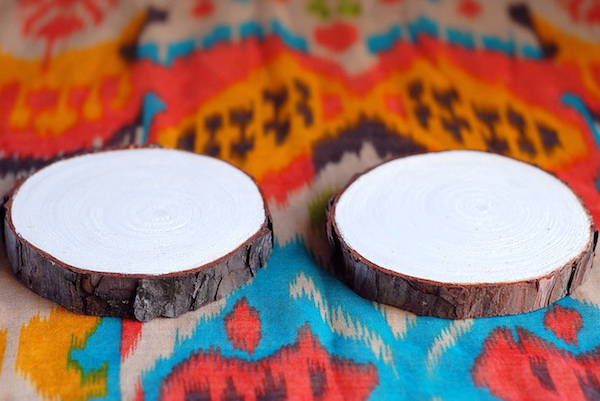
Paint your wood slices.
After your wood has dried, you can add a layer of paint. Depending on the style and how much of the wood you want to show through, you might want multiple coats.
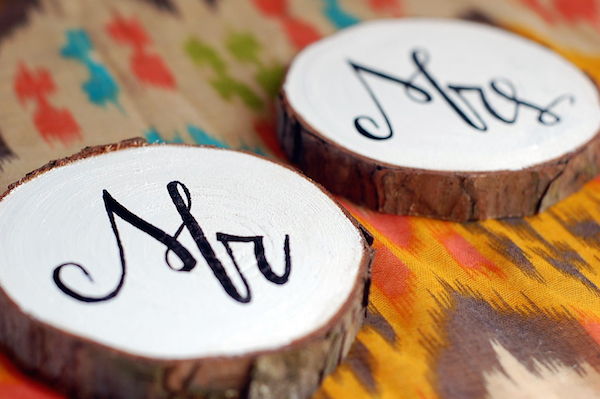
For these coasters I used white acrylic paint and painted along the edges to leave the ring of bark without paint for a nice outside ring of bark around the coaster. Allow the paint to dry completely, especially between coats since some paint will soak into the wood.
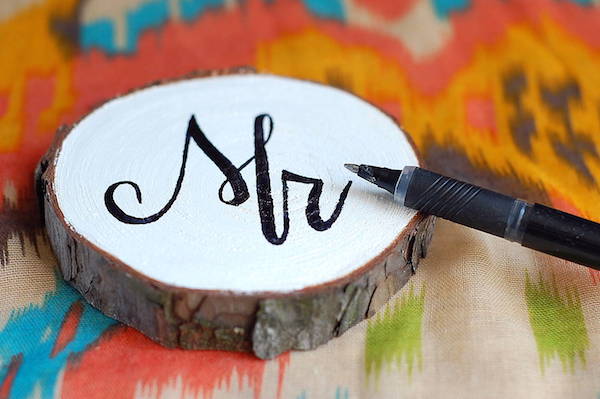
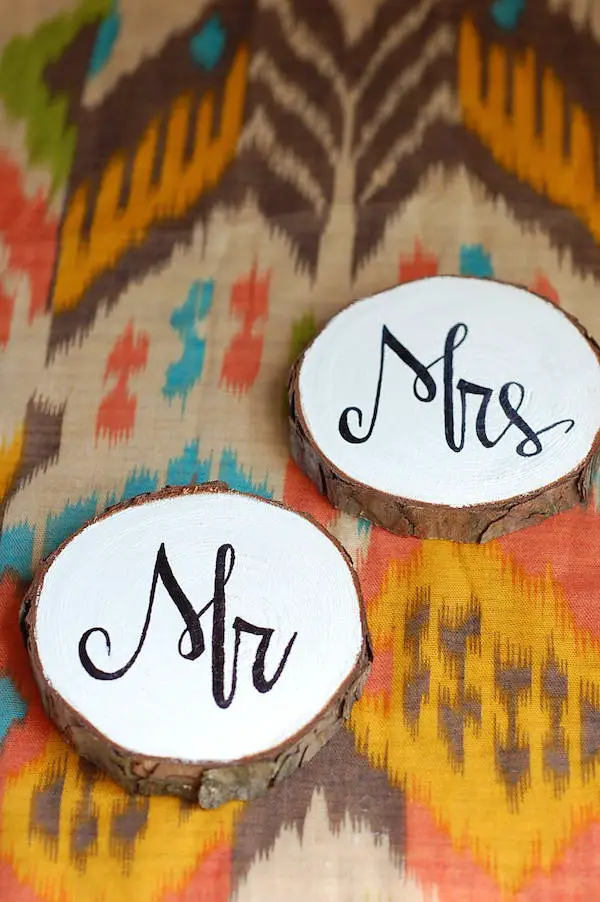
Write on the wood slices.
After your wood coasters have been painted and left alone to dry, it’s time to create a design for the coasters. Here you can see a classic set with “Mr” & “Mrs” that were given as a gift but you could do these with names of bridal party members or even go further and do them for all guests as place cards. The possibilities are endless and you can add a word or a design or anything you’d like to make!

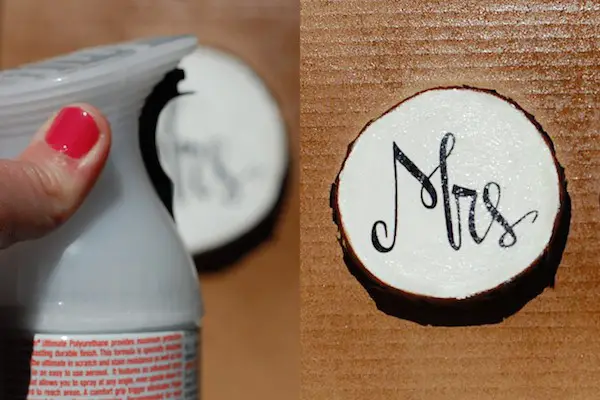
Seal your wood coasters.
The final step is sealing your wood coasters so they can be used. Treating the wood with a finish will preserve the wood slices better and make them somewhat water resistant. It’s an optional step depending on how you plan to use the coasters (functional vs just decorative). It’s also recommended if you are using the wood slices as coasters or favors for your guests to take home.
Use your wood finish and paint brushes to treat the wood with a thin, consistent layer. Let them dry outside in the sun or in a workshop.
Of course there are a lot of ways you could go about creating these wood coasters, but this is just one way to complete the DIY wood coasters. Since creating these months ago they still look good after minimal use and made a great gift!
Enjoy your painted wood coasters!